


Fiat Uno Manual
Bodywork
Plastic components
1 With the use of more and more plastic
body components by the vehicle
manufacturers (e.g. bumpers, spoilers, and in
some cases major body panels), rectification
of more serious damage to such items has
become a matter of either entrusting repair
work to a specialist in this field, or renewing
complete components. Repair of such
damage by the DIY owner is not really
feasible owing to the cost of the equipment
and materials required for effecting such
repairs. The basic technique involves making
a groove along the line of the crack in the
plastic using a rotary burr in a power drill. The
damaged part is then welded back together
by using a hot air gun to heat up and fuse a
plastic filler rod into the groove. Any excess
plastic is then removed and the area rubbed
down to a smooth finish. It is important that a
filler rod of the correct plastic is used, as
body components can be made of a variety
of different types (e.g. polycarbonate, ABS,
polypropylene). Damage of a less serious
nature (abrasions, minor cracks, etc.) can be
repaired by the DIY owner using a two-part
epoxy filler repair material. Once mixed in
equal proportions, this is used in similar
fashion to the bodywork filler used on metal
panels. The filler is usually cured in twenty to
thirty minutes, ready for sanding and
painting.
2 If the owner is renewing a complete component himself, or if he has repaired it with epoxy filler, he will be left with the problem of finding a suitable paint for finishing which is compatible with the type of plastic used. At one time the use of a universal paint was not possible owing to the complex range of plastics encountered in body component applications. Standard paints, generally speaking, will not bond to plastic or rubber satisfactorily. However, it is now possible to obtain a plastic body parts finishing kit which consists of a pre-primer treatment, a primer and coloured top coat.
Full instructions are normally supplied with a kit, but basically the method of use is to first apply the pre-primer to the component concerned and allow it to dry for up to 30 minutes. Then the primer is applied and left to dry for about an hour before finally applying the special coloured top coat. The result is a correctly coloured component where the paint will flex with the plastic or rubber, a property that standard paint does not normally possess.
Rear view mirrors
Interior
3 The mirror is of safety type, “breaking” off
its ball fixing upon impact from a front seat
occupant.
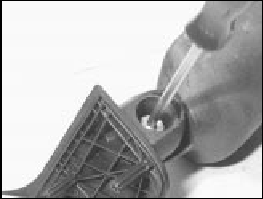
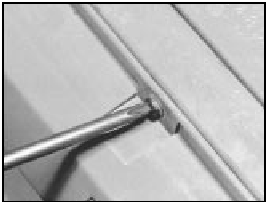
4 To remove the mirror, grip the head and push it towards the windscreen; the ball socket will release (photo).
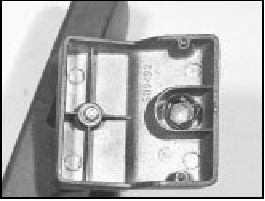
17.4 Interior mirror base
5 Extract the screws from the mounting plate (photo).
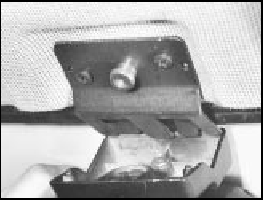
17.5 Interior mirror mounting plate
6 When refitting the mirror, engage the front of the socket on the ball and then twist the mirror rearwards and upwards.
Exterior
7 On models without remotely-controlled
type exterior mirrors, the ball-jointed mirror is
held in position by the two self-tapping
screws which secure the triangular trim plate
inside the car (photos).
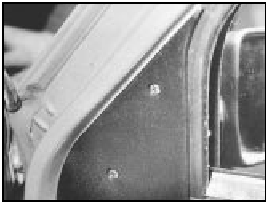
17.7A Exterior mirror trim plate
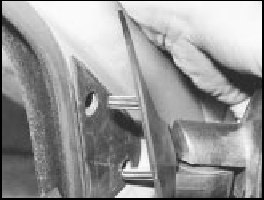
17.7B Withdrawing the exterior mirror
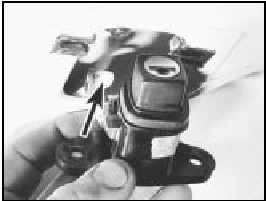
8 To dismantle the mirror, extract the balljoint fixing screw, but take care as considerable force is exerted by the interior coil spring (photo).
17.8 Extracting the mirror balljoint screw
Door armrest
9 A redesigned armrest is used on some
models. This is simply secured by two
self-tapping screws (photo).
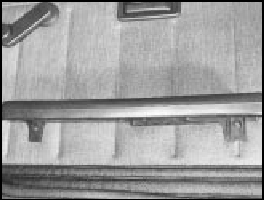
17.9 Door armrest
Tailgate (Turbo ie model) -
component
removal and refitting
10 The tailgate on these models is of plastic
injection-moulded type, with a bonded
window glass.
11 Renewal of the glass or repair of the tailgate should be entrusted to your FIAT dealer or a specialist repairer, due to the need for special products and techniques.
12 To remove the tailgate lock and handle, open the tailgate and extract the lock handle screws.
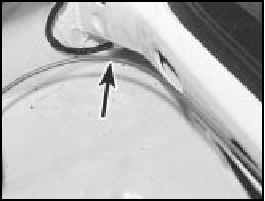
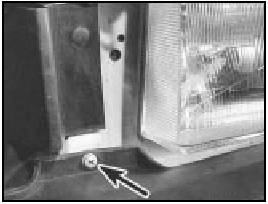
13 Prise off the link rod socket from the ball-pin (photo). Unbolt and remove the handle and lock.
17.13 Tailgate handle link rod (arrowed)
14 A remote type of tailgate release is fitted, with a control handle located by the driver’s seat. Access to the handle can be obtained by removing the seat and sill trim, and peeling back the carpet.
15 If a new cable is to be fitted, disconnect it from the tailgate latch, tape the new cable to the old one, and draw it carefully around the side panel and sill trim (photo).
17.15 Tailgate release cable (arrowed)
16 To remove the tailgate wiper motor, first take off the wiper arm and blade.
17 Extract the plastic clips and take off the wiper motor protective cover.
Disconnect, unbolt, and remove the wiper motor (photo).
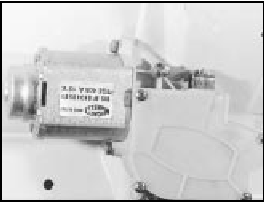
17.17 Tailgate wiper motor
18 Refitting of all components is a reversal of removal.
Radiator grille (1301 cc
Turbo ie model) -
removal and refitting
19 The grille is secured by a central screw
and two upper clips. Use a screwdriver to
prise the tabs on the upper clips downwards
(photos).
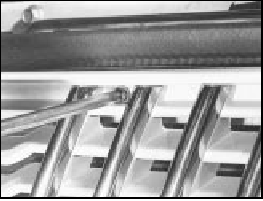
17.19A Extracting a radiator grille screw
17.19B Prising down a radiator grille clip
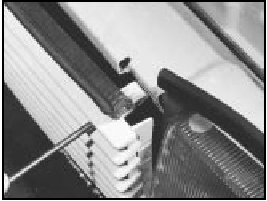
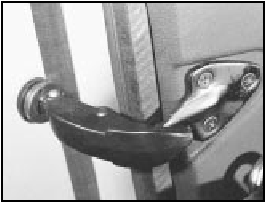
20 Lift the grille upwards and forwards to disengage its lower mountings (photo).
17.20 Removing the radiator grille from a 1301 cc Turbo ie model
21 Refitting is a reversal of removal.
Radiator grille (1372 cc ie
and 1372 cc Turbo ie
models) - removal
and refitting
22 The radiator grille on these models is
secured by screws at the top edge (photo).
Raise and support the bonnet. Undo the retaining screws, then lift the grille clear.
17.22 Radiator grille screw removal on a 1372 cc SX ie model
23 Refit in the reverse order of removal.
Bumpers (1301 cc Turbo ie,
1372 cc ie and 1372 cc
Turbo ie models) -
removal and refitting
Removal - front
24 Remove the radiator grille as previously
described, to provide access to the bumper
upper mounting screws (photo).
17.24 Front bumper upper mounting screw (arrowed)
25 The ends of the bumpers are secured with bolts and captive nuts but to reach them, the underwing shields must be released and pulled away.
26 Disconnect the leads from the auxiliary lamps which are mounted in the spoiler, and then lift the bumper/spoiler from the car.
Removal - rear
27 Open the tailgate to provide access to the
bumper upper mounting screws.
28 Disconnect the leads from the rear number plate lamp. Unscrew the lower mounting nuts (photo).
17.28 Rear bumper lower mounting nut
29 Disconnect the bumper end fixings, which are accessible under the rear wing edges (photo).

17.29 Unscrewing a bumper end fixing nut
Refitting - front and rear 30 Refitting either front or rear bumpers is a reversal of removal.
Rear hinged windows -
removal and refitting
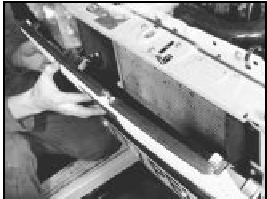
31 These have toggle-type catches and
hinges bolted directly through the glass
(photo).
17.31 Rear window toggle-type catch
32 To remove the window glass, have an assistant support it, and then unscrew the cross-head hinge screws and the toggle catch anchor plate screws. Lift the glass away. If the toggle catch must be removed from the glass, first drive out the handle pivot pin and then, using a pin wrench or circlip pliers, unscrew the ring nut which secures the handle to the glass.
33 When refitting the screws or ring nut to the glass, make sure that the insulating washers are in good condition to prevent metal-to-glass contact.
Door trim panel
(Turbo ie model) -
removal and refitting
34 The operations are similar to those
described in Chapter 12, Section 11, except
that electric windows are fitted instead of a
conventional mechanical regulator and
handle. Before the trim panel can be
withdrawn, the window control switches
must be disconnected from the wiring plug,
and the plug fed through the panel aperture
(photos).
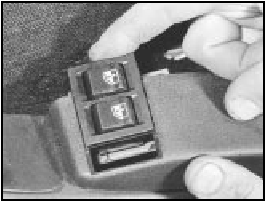
17.34A Armrest electric window switches
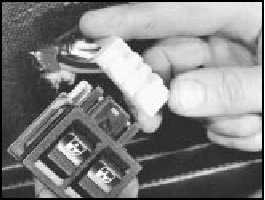
17.34B Disconnecting an electric window regulator switch plug
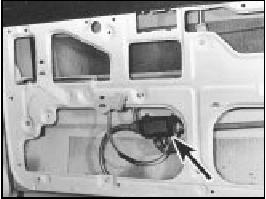
17.34C Door interior showing electric window motor (arrowed)


